This is an interactive notebook. You can run it locally or use the links below:
Prerequisites
Before you begin, install and import the required libraries, get your W&B API key, and initialize your Weave project. Completing this step ensures that your environment can authenticate with W&B and log traces to your Weave project.Create and iterate on prompts with Weave
Good prompt engineering is critical to guiding the model to properly extract entities. In this section, you author an initial prompt, publish it to Weave so you can track changes over time, and then refine it with stricter validation rules. First, create a basic prompt that gives the model the instructions on what to extract from the image data and how to format it. Then, store the prompt in Weave for tracking and iteration.Get the dataset
With a prompt in place, you next need input data to run through the pipeline. Retrieve the dataset of handwritten notes that serves as input for the OCR pipeline. The images in the dataset are alreadybase64 encoded, which means that the LLM can use the data without any pre-processing.
Build the NER pipeline
Now that you have a prompt and a dataset, build the NER pipeline that connects them to the VLM. The pipeline consists of two functions:- An
encode_imagefunction that takes a PIL image from the dataset and returns abase64encoded string representation of the image that can be passed to the VLM. - An
extract_named_entities_from_imagefunction that takes an image and system prompt and returns the extracted entities from that image as described by the system prompt.
named_entity_recognation that:
- Passes the image data to the NER pipeline.
- Returns correctly formatted JSON with the results.
@weave.op() decorator to automatically track and trace function execution in the W&B UI.
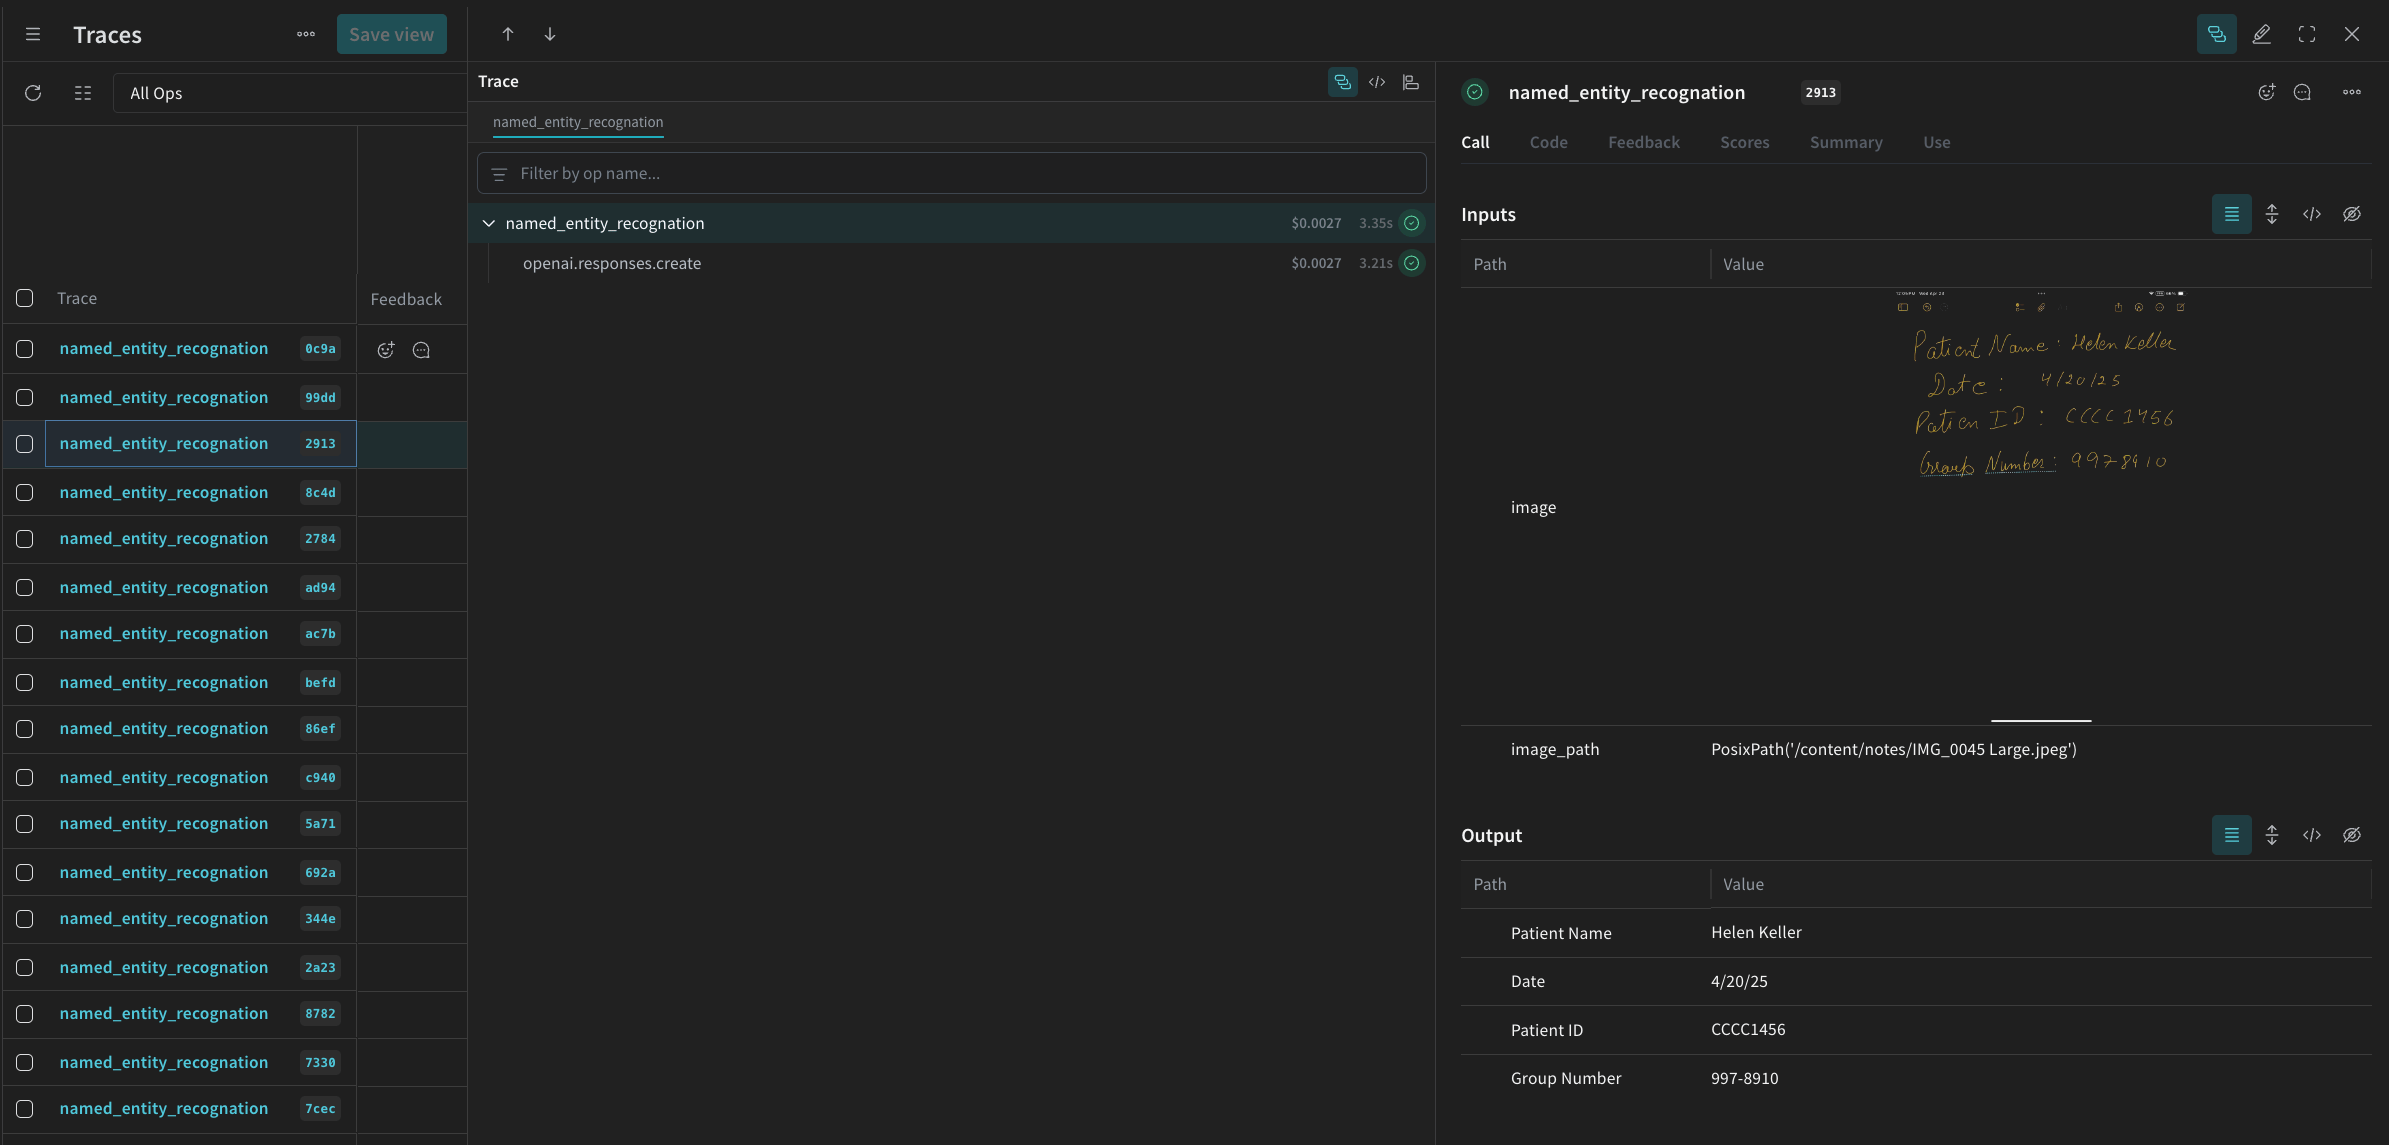
Every time named_entity_recognation runs, the full trace results are visible in the Weave UI. To view the traces, navigate to the Traces tab of your Weave project.
processing_results.json. The results are also viewable in the Weave UI.
Evaluate the pipeline using Weave
Now that you have created a pipeline to perform NER using a VLM, you can use Weave to systematically evaluate it and find out how well it performs. Evaluating the pipeline lets you measure extraction quality across the full dataset rather than relying on spot checks. For more information about Evaluations in Weave, see Evaluations Overview. A fundamental part of a Weave Evaluation is the Scorer. Scorers evaluate AI outputs and return evaluation metrics. They take the AI’s output, analyze it, and return a dictionary of results. Scorers can use your input data as reference if needed and can also output extra information, such as explanations or reasonings from the evaluation. In this section, you create two scorers to evaluate the pipeline:- Programatic scorer.
- LLM-as-a-judge scorer.
Programatic scorer
The first Scorer is a deterministic check that runs without an LLM. The programmatic scorer,check_for_missing_fields_programatically, takes the model output (the output of the named_entity_recognition function), and identifies which keys are missing or empty in the results.
This check is useful for identifying samples where the model missed capturing any fields.
LLM-as-a-judge scorer
Because the programmatic scorer only catches missing or empty fields, you need a second scorer to check whether the extracted values match what appears in the image. In this step of the evaluation, you provide both the image data and the model’s output to ensure the assessment reflects actual NER performance. The image content is explicitly referenced, not just the model output. The scorer used for this step,check_for_missing_fields_with_llm, uses an LLM to perform scoring (specifically OpenAI’s gpt-4o). As specified by the contents of the eval_prompt, check_for_missing_fields_with_llm outputs a Boolean value. If all fields match the information in the image and formatting is correct, the scorer returns true. If any field is missing, empty, incorrect, or mismatched, the result is false, and the scorer also returns a message explaining the problem.
Run the evaluation
With both Scorers defined, you can now run the evaluation. Define an evaluation call that automatically loops over thedataset passed and logs the results together in the Weave UI.
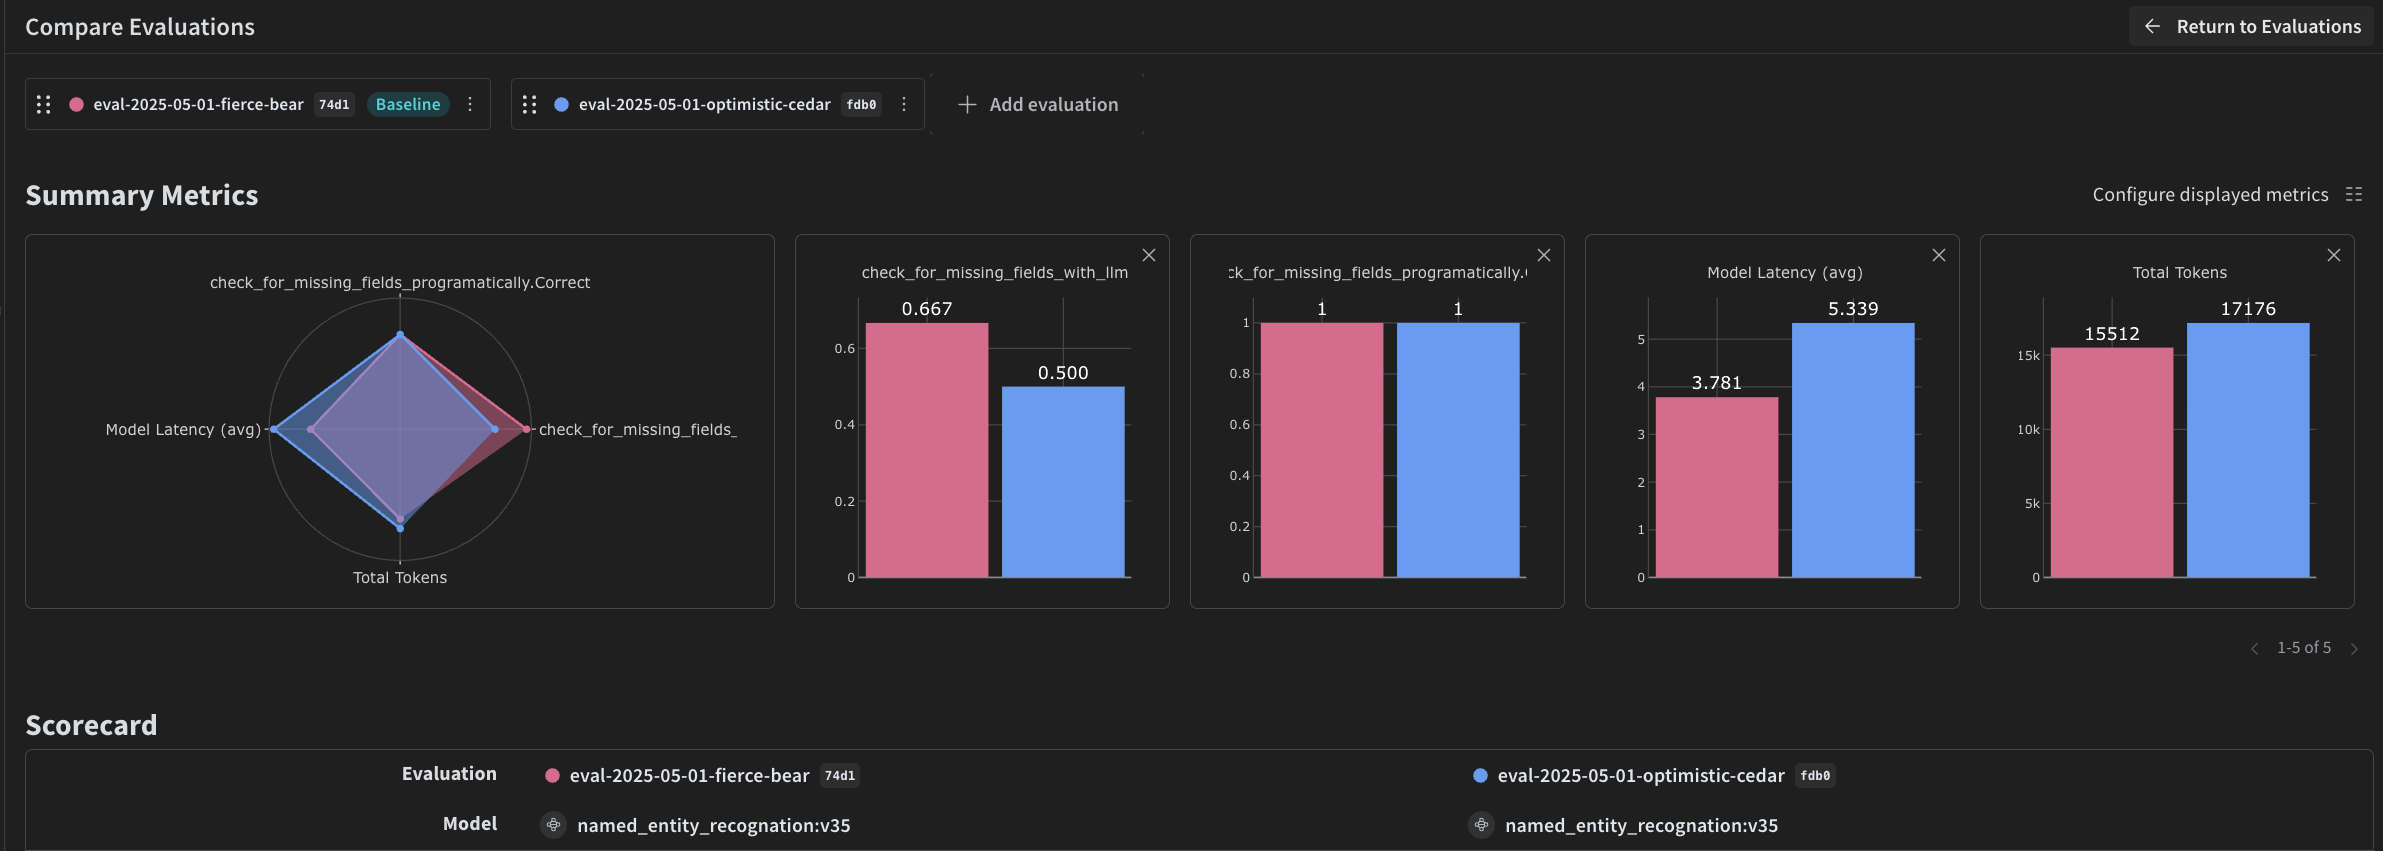
The following code kicks off the evaluation and applies the two Scorers to every output from the NER pipeline. Results are visible in the Evals tab in the Weave UI.